Showing posts with label Micromax. Show all posts

MIUI Custom ROM For Micromax Canvas 4 A210

Micromax Canvas 4 A210 a device which has accompained a million of people as its likers. Today we are writing a step by step guide on how to install MIUI custom ROM in your Micromax device.To enjoy all the features of this awesome ROM one must have to root Canvas 4 A210 and install CWM recovery.


DISCLAIMER: Ultimate Tech Geek doesnot take any responsibilty if any thing happens to your phone as you are doing it at your own risk.
After you will root Micromax Canvas 4 A210 then you will lose the warranty of your device.

PRE-REQUIREMENTS:

1. Your Canvas Should have at least 70% battery to root it.
2. Download and Install USB Drivers of Micromax Canvas 4 A210.
3. Download MIUI Custom ROM.
4. Enable USB debugging mode in your device.

Screenshots of the Custom ROM:


How To Install MIUI Custom ROM for Micromax Canvas 4 A210:


Step by Step Guide of Installation :

1. Copy downloaded files in to your SD card.

 2. Now Switch Off your Micromax Canvas 4 A210  and boot into CWM Recovery by key combinations " Pressing Volume Up and power key (together for sometime till boot menu opens).Use Volume keys to move up and down and use power key to select.

3. Perform a full data wipe by selecting "wipe data/factory reset" and "wipe cache partition" and then go to advanced section and from there select "wipe Dalvik cache".

4. Now go to main menu and select "install zip from SD card">MIUI Custom Rom>confirm yes.The process will take 5 minutes as it is not a long process.The ROM will get installed after this.

6. Now go back to main menu and reboot your device.It will take usually 5-10 minutes.As all apps will load in system.


Root Micromax Canvas Doodle 2 A240


Micromax has become one of the  famous brands of India after the launch of its Canvas series which impressed everyone with their amazing features at cheap prices.When we come to Micromax Canvas Doodle 2 A240  which is something more than Canvas 2 and Canvas A116 HD.It is a attractive option as it is just Rs 18,000.

If you have bought this device and decided to root Doodle 2 A240.Then you can do this simple task by following these easy steps to root:

DISCLAIMER: Ultimate Tech Geek doesnot take any responsibilty if any thing happens to your phone as you are doing it at your own risk.
After you will root Micromax Canvas Doodle 2 A240 then you will lose the warranty of your device.

PRE-REQUIREMENTS:

1. Your Canvas Should have at least 70% battery to root it.
2. Download and Install USB Drivers of Micromax Canvas Doodle 2 A240.
3. Download Rooting package.
4. Enable USB debugging mode in your device.

How To Root Micromax Canvas Doodle 2 A240 :

1. Just extract the rooting package and just connect your canvas to PC.
2. Now you are device would be recognized if you have installed USB drivers correctly.
3. Now open the extracted folder of rooting package and just open Runme.bat file in the folder.
4. A dialog box will appear on the screen follow the simple instructions carefully.
5. After this your device will  reboot as your Canvas Doodle has got rooted.
6. Just wait till it reboot successfully.
7. Now just disconnect your device from PC and check in the apps list did "superuser" app added or not.
8. If it is in the list you have rooted your Canvas.And if not then repeat the process.

Root Micromax Canvas A72 Viva Securely

Micromax Canvas A72 Viva

Micromax Canvas A72 Viva is one of the best and attractive phone by Micromax and in a good price range of Rs.6300 INR. Micromax Canvas A72 Viva comes with Android 2.3 Ginger bread. If you have bought this marvelous A72 Viva then you are searching how to root Micromax Canvas A72 Viva.Then you are right place we are going to provide you one of the secure and assured method to easily root Micromax Canvas A72 Viva.

Disclaimer :Ultimate Tech Geek does not take any responsibility if your device stops working, you will try this at your own risk. Later you cannot blame us if your device stops working or something happens.

Important Note (Pre-requirements) :

1. Your mobile should have 70%-80% battery. (We recommend you should charge the battery 100%)

2.You should enable USB Debugging mode in your android device. (All applications>Settings>Manage Applications>Development> USB Debugging)

3. You must back up your device data to keep it safe.

4. Install Micromax Canvas A72 Viva USB Drivers from here.

5. Download the file to root Micromax Canvas A72 Viva
Step by Step Guide of Rooting Micromax Canvas A72 Vova :

1. Install the piranhabox and open the application.
2.You will see the current dialog box just adjust the settings as shown in image below.

Root Micromax Canvas A72 Viva Securely at ultimatechgeek.com

3.  Go to MTK tab present on the left side.
4. Now see  on the right side , select options OneKey Root and USB scan options.
5.Now connect your Micromax Canvas A72 Viva through USB cable to the computer.
6. Now click on the start button to start the process.Once the process is 100% completed your device will be rooted.

Now you successfully rooted Micromax Canvas A72 by following our article "How To Root Micromax Canvas A72 Viva".

Install Official Stock ROM For Micromax A57 Ninja 3

Install Official Stock ROM For Micromax A57 Ninja 3 by ultimatechgeek.com

Yet another wonderful phone of Micromax. Are you searching for the Official Custom ROM For Micromax A57 Ninja 3.Then you are right place today I am going to present you the way through which one can install stock ROM in Micromax A57 Ninja 3.By installing this stock rom in Micromax A57 one can
easily retrieve their original warranty in Micromax device as this is the official ROM by Micromax.


You may also like to Read : 5 Best Antivirus Apps For Android Phones 2013

Disclaimer :Ultimate Tech Geek does not take any responsibility if your device stops working, you will try this at your own risk. Later you cannot blame us if your device stops working or something happens.The credits goes to original developers.

Important Note (Pre-requirements) :

1. Your mobile should have 70%-80% battery. (We recommend you should charge the battery 100%)

2.You should enable USB Debugging mode in your android device. (All applications>Settings>Manage Applications>Development> USB Debugging)

3. You must back up your device data to keep it safe.

5. Your Micromax A57 Ninja 3 must be rooted and (CWM) Clockword Mod Installed in it.If you don't know refer to this article.

6. Download the Official Custom ROM For Micromax A57 Ninja 3.

Step by Step Guide of Installation To Install Official Stock ROM In Micromax A57 Ninja 3:

1. Copy downloaded files in to your SD card.

 2. Now Switch Off your Micromax A57 Ninja 3  and boot into CWM Recovery by key combinations " Pressing Volume Up and power key (together for sometime till boot menu opens).Use Volume keys to move up and down and use power key to select.

3. Perform a full data wipe by selecting "wipe data/factory reset" and "wipe cache partition" and then go to advanced section and from there select "wipe Dalvik cache".

4. Now go to main menu and select "install zip from SD card">Official Custom ROM For Micromax A57 Ninja 3>confirm yes.The process will take 5 minutes as it is not a long process.The ROM will get installed after this.

6. Now go back to main menu and reboot your device.It will take usually 5-10 minutes.As all apps will load in system.

You may also like to Read : Top 10 free Android Apps of 2013

 Don't be in hurry.Please be patient while performing the above steps.

Newly Developed Canva4HD Custom ROM For Micromax A116 HD


Last time we provide you SAM HD V3 custom ROM for your Micromax Canvas A116 HD.Now we come with this newly designed custom ROM for A116 HD based on the Canvas 4.This ROM is made by Abhishek an XDA developer.This Android 4.2.1 jellybean version Canva4HD Custom ROM For Micromax A116 HD.The Rom provides a better customization and smoothness to your device.If you are thinking what are the key features of this custom ROM then read below :


1.Blow the air to unlock the screen lock.
2.Shake your device to unlock the screen lock.
3. This awesome feature was in Samsung Galaxy S4 called Smart Pause.
4. The camera is enhanced by Multi angle view shot and Paranoma.

5. 99 Brust Shots makes your phone pics colorful.
6. New M!Security.
7. New M!Power.
and etc.

You are really excited to install this aren't you that's why now we come to the main topic on "How To Install And Download Newly Developed Canva4HD Custom ROM For Micromax A116 HD".

You may also like to Read : 5 Best Antivirus Apps For Android Phones 2013

Disclaimer :Ultimate Tech Geek does not take any responsibility if your device stops working, you will try this at your own risk. Later you cannot blame us if your device stops working or something happens.The credits goes to original developers.

Important Note (Pre-requirements) :

1. Your mobile should have 70%-80% battery. (We recommend you should charge the battery 100%)

2.You should enable USB Debugging mode in your android device. (All applications>Settings>Manage Applications>Development> USB Debugging)

3. You must back up your device data to keep it safe.

4. Install Micromax A116 HD USB Drivers from here.

5. Your Micromax A116 HD must be rooted and (CWM) Clockword Mod Installed in it.If you don't know refer to this article.

6. Download the Canva4HD Custom ROM For Micromax A116 HD.


Step by Step Guide of Installation :

1. Copy downloaded files in to your SD card.

 2. Now Switch Off your Micromax A116 HD  and boot into CWM Recovery by key combinations " Pressing Volume Up and power key (together for sometime till boot menu opens).Use Volume keys to move up and down and use power key to select.

3. Perform a full data wipe by selecting "wipe data/factory reset" and "wipe cache partition" and then go to advanced section and from there select "wipe Dalvik cache".

4. Now go to main menu and select "install zip from SD card">Canva4HD Custom ROM For Micromax A116 HD>confirm yes.The process will take 5 minutes as it is not a long process.The ROM will get installed after this.

6. Now go back to main menu and reboot your device.It will take usually 5-10 minutes.As all apps will load in system.

You may also like to Read : Top 10 free Android Apps of 2013

 Don't be in hurry.Please be patient while performing the above steps.

How to Root and Install Jelly Bean Sam HD V3 Custom Rom on Micromax Canvas A116 HD

How to Root and Install Jelly Bean Sam HD V3 Custom Rom on Micromax Canvas A116 HD at ultimatechgeek.com
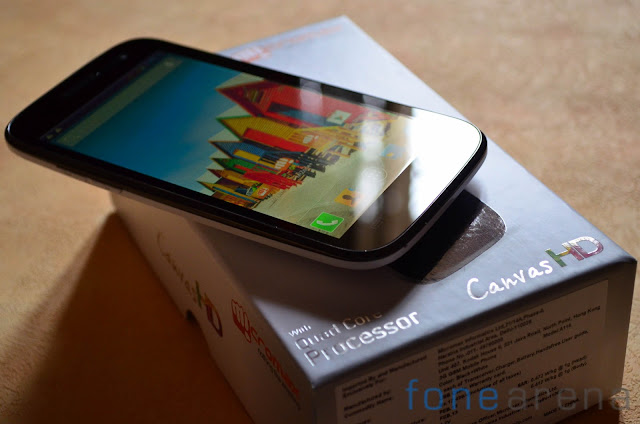
Photo by Fone arena
Micromax Canvas A116 hd is the the cheapest ,above average smart phone from brand which is emerging at a great rate  in Indian Market. Micromax is giving a good competition to the top brands like Samsung , LG, Sony etc . Micromax canvas A116 HD comes with Jelly bean and a Quad core processor having 1GB RAM for greater multitasking and for HD gaming experience, have IPS LCD Capacitive touch screen for a full flawless experience. The 8 megapixel camera with dual-LED flash and autofocus provides a great picture quality and the Micromax Canvas comes with many features that an excellent smartphone must have.

Now we come to the main topic for Rooting and installing a new custom Rom on Micromax canvas a116,we have to do the task in three to four steps which are mentioned and explained below:-

1. Install CWM recovery software on canvas by using SP Flash tool
2. After that we can easily root it by placing the SU file AND Flashing it with CWM.
3. Making Backup of your original Stock Rom by CWM.
4. Flashing the Custom Rom by CWM recovery.

Disclaimer : Ultimate Tech Geek does not take any responsibility if your device stops working, you will try this at your own risk. Later you cannot blame us if your device stops working or something happens.


Important Note (Pre-requirements) :

1. Your mobile should have 70%-80% battery. (We recommend you should charge the battery 100%)

2.You should enable USB Debugging mode in your android device. (All applications>Settings>Manage Applications>Development> USB Debugging)

3. You must back up your device data to keep it safe.

4. Install Micromax A116 USB Drivers from here.

Install CWM recovery software on Micromax Canvas A116 HD by using SP Flash tool :

1. Download SP Flash tool rar file from the given link and extract it to your computer.
2. Now you have to download the cwm recovery.img file from the link provided.
3. Rename that file to recovery.img
4. Run flash tool from the folder you extracted above.
5. Click on the scatter loading button on the right side of flash tool window and locate the file
   MT6589_Android_scatter_emmc.txt from the given link.
6. Now switch off your Micromax Canvas A116 HD  and remove the battery for 10 sec then insert battery.
7. Click download button available on the flash tool window.
8. Connect your  Micromax Canvas A116 HD to PC via USB data cable , the flashing will start and the green ring icon will display on computer screen then flashing is completed.

Rooting the Micromax  Canvas A116 HD:

1. Download the SU pack and SU bin files from the given link.
2. Move the files to the eternal SD card of phone.
3. Use the key combination to the get to the recovery menu i.e volume up + volume down + Power    Button.You will see modes, select recovery mode. if you see Clockwork recovery mode then you have flashed clock work recovery on it.
4. Go to install zip from SD card and choose the two files simultaneously and install them.
5 . Now choose restart system now option and hence you have rooted your  Micromax Canvas A116   if you see super user icon inside the main menu of your phone.

Making Backup of your Original Stock Rom by CWM:

1. You can make back up of your stockrom by rebooting in to recovery mode as shown above.
2. Select Backup data option.
3. The phone will make backup of all data to your external SD card inside clockwork mod folder.
4 . Be Patient it will take some time.
5. After some time it will show a message that all Backup completed.

Flashing the Custom Rom by CWM Recovery:

1. Download the Sam HD V3 custom rom rar file the given link.
2. Move the file to your phones SD card.
3. boot in to the CWM Recovery mod by key combination.
4. Now perform full data wipe by selecting wipe data/ factory rest and wipe cache partition.
5. Then select install update from SD card choose the Sam HD file then apply update .
6. It will take some till to complete the update  process.
7. After update is completed select reboot system now option.
8. Thus all is done You Have Installed Jelly Bean Sam HD V3 Custom Rom on your Micromax Canvas A116 HD


Easy Steps To Unroot Micromax A110- Canvas 2


Have you rooted your Micromax Canvas 2 to avail many of the awesome features like playing games and installing apps.You now that this phone was one of the best seller in Flipkart and Ebay.But you now want to get the phone's warranty back then you are at right place.To avail your warranty of Micromax A110 you have to unroot it. The process is very simple and easy.We will guide you step by step to Unroot Micromax A110- Canvas 2.


Disclaimer :Ultimate Tech Geek does not take any responsibility if your device stops working, you will try this at your own risk. Later you cannot blame us if your device stops working or something happens.


Important Note (Pre-requirements) :

1. Your mobile should have 70%-80% battery. (We recommend you should charge the battery 100%)

2.You should enable USB Debugging mode in your android device. (All applications>Settings>Manage Applications>Development> USB Debugging)

3. You must back up your device data to keep it safe.

4. Install Micromax A110 USB Drivers from here.

Easy Steps To Unroot Micromax A110- Canvas 2:

1. Download "Root Uninstaller" to unroot your device.And now extract it.

2.Install the drivers correctly you downloaded from above link.

3.Open the extracted folder and open the "Runme.bat file" and select "x)option" in the open application.

4. Wait 5 minutes.Don't do anything while the process is on going.

5.Your device will reboot after the process completes.

Nice job.You unrooted your Micromax Canvas 2.

How To Install Jelly Bean 4.1.2 In Micromax A110 - Canvas 2


You will be happy to know that you can install the latest version 4.1.2 Jellybean in your Micromax A110 - Canvas 2 in easy way.Already we know that every phone becomes better  after installing new Android Firmware. As apps are upgrading we should also upgrade our android version.So now I am going to tell you "How To Install Jelly Bean 4.1.2 In Micromax A110 - Canvas 2".

Please follow step by step guide on "How To Install Jelly Bean 4.1.2 In Micromax A110 - Canvas 2".

Disclaimer :Ultimate Tech Geek does not take any responsibility if your device stops working, you will try this at your own risk. Later you cannot blame us if your device stops working or something happens.

Important Note (Pre-requirements) :

1. Your mobile should have 70%-80% battery. (We recommend you should charge the battery 100%)

2.You should enable USB Debugging mode in your android device. (All applications>Settings>Manage Applications>Development> USB Debugging)

3. You must back up your device data to keep it safe.

4. Install Micromax A110 - Canvas 2 USB Drivers from here.

5. Download the file to root Micromax A110 - Canvas 2

Step by Step Guide To Install Jellybean 4.1.2 In Micromax A110:

1. Install the USB Drivers From the above link and extract the Sp Flash Tool File and JellyBean 4.1.2 file.

2. Now Open /Run "Sp Flash Tool" file from the extracted folder.


3. Now From the Sp Flash Tool,click on the Scatter Loading Button as shown in the screen and choose "MT6573_Android_Scatter.txt" file from the extracted folder.


4. Now go to the file menu, "Click Option" --> "Click USB Model and Choose Option"--->" DA Download All"-->"Speed"--->"Click High Speed".


5.Now click on Firmware download.

6.Now Switch off your device and take your battery out and insert it back.But caution don't switch on your device.Connect your device via USB cable with your laptop or computer  to begin the flashing process automatically.

7.You can see the percentage in Sp flash tool at bottom and when green ring/circle appears the process is completed.Then you can disconnect your device.

Now you have installed you jellybean 4.1.2 in Micromax A110 successfully.

Don't be in Hurry Please be calm and patient while doing the process.

Easy Way To Root Micromax A89 Ninja

Easy Way To Root Micromax A89 Ninja by ultimatechgeek.com


Micromax a brand of mobile which have become a revolutionary company by providing fabulous gadgets to the people at cheap rates.In this article, I am going to tell you "How To Root Micromax A89 Ninja ".This android is running on ice cream sandwich which has become very old now so people need to root Micromax A89 Ninja to get a better experience of Micromax A89 Ninja.

Disclaimer :Ultimate Tech Geek does not take any responsibility if your device stops working, you will try this at your own risk. Later you cannot blame us if your device stops working or something happens.

Important Note (Pre-requirements) :

1. Your mobile should have 70%-80% battery. (We recommend you should charge the battery 100%)

2.You should enable USB Debugging mode in your android device. (All applications>Settings>Manage Applications>Development> USB Debugging)

3. You must back up your device data to keep it safe.

4. Install Micromax A89 USB Drivers from here.

5. Download the file to root Micromax A89 Ninja
Step by Step Guide of Rooting Micromax A89 Ninja :

1. You need to Install the USB Drivers and extract the download Bin4ry Tool.

2. Now, open "Runme.bat" from the extracted folder.

3. Connect device to the computer or laptop via your data cable / USB cable.

4. Make it sure that your device is connected and drivers installed.

5.Now,go through "Runme.bat file" and choose option "1- Normal mode".

6. Follow the on-screen instructions and wait for few minutes till the process is completed.

 Don't be in hurry.Please be calm while performing the above steps.

How To Install Crystal Zen Mode Custom Rom For Micromax A52


Everybody is waiting for the custom ROM for Micromax A52? After lot of work by the techies your wait is over now.We are bringing you the latest Crystal Zen Mode Custom Rom For Micromax A52.This ROM is developed by these four people Jaysidh Dumbali,Aman Kapoor,Arnab Gharay and Keval Dholakiya.We appreciate their work.

Now we come to the main topic "How To Install Custom ROM for Micromax A52 in simple steps? ".So we
will give you step by step guide on "How To Install Custom ROM for Micromax A52".Open your eyes read the next lines carefully.

Disclaimer : The ROM is not developed by Ultimate Tech Geek.So all credits go to developers.And you will try this at your own risk.Later you cannot blame us if your device stops working or something happens.

Important Note (Pre-requirements) :

1. Your mobile should have 70%-80% battery. (We recommend you should charge the battery 100%)

2.You should enable USB Debugging mode in your android device. (All applications>Settings>Manage Applications>Development> USB Debugging)

3. The phone must be rooted and you must have CWM (ClockworkMod) installed in your device.

4. You must back up your device data to keep it safe.

Step by Step Guide of Installation :

1. Download Crystal Zen Mode Custom Rom For Micromax A52 . Copy downloaded files in to your SD card.

 2. Now Switch Off your Micromax A52  and boot into CWM Recovery by " Pressing Volume Up and power key (together for sometime till boot menu opens).Use Volume keys to move up and down and use power key to select.

3. Perform a full data wipe by selecting "wipe data/factory reset" and "wipe cache partition" and then go to advanced section and from there select "wipe Dalvik cache".

4. Select option "Mount and Storage>Mount system and Data>Come Back to Main Menu".

5. Now go to main menu and select "install zip from SD card">Crystal Zen Mode Custom ROM>confirm yes.The process will take 5 minutes as it is not a long process.The ROM will get installed after this.

6. Now go back to main menu and reboot your device.It will take usually 5-10 minutes.As all apps will load in system.

 Don't be in hurry.Please be calm while performing the above steps.